# PProf
pprof 是用于可视化和分析性能分析数据的工具
# pprof支持什么使用模式
- 交互式终端使用
- Web 界面
- 报告生成
# 可以做什么
- CPU Profiling:CPU 分析,按照一定的频率采集所监听的应用程序 CPU(含寄存器)的使用情况,可确定应用程序在主动消耗 CPU 周期时花费时间的位置
- Memory Profiling:内存分析,在应用程序进行堆分配时记录堆栈跟踪,用于监视当前和历史内存使用情况,以及检查内存泄漏
- Block Profiling:阻塞分析,记录 goroutine 阻塞等待同步(包括定时器通道)的位置
- Mutex Profiling:互斥锁分析,报告互斥锁的竞争情况
# 示例
```golang
package main
import (
"fmt"
"log"
"net/http"
_ "net/http/pprof" // 导入pprof包
)
func GetFibonacciSerie(n int) []int {
ret := make([]int, 2, n)
ret[0] = 1
ret[1] = 1
for i := 2; i < n; i++ {
ret = append(ret, ret[i-2]+ret[i-1])
}
return ret
}
func index(w http.ResponseWriter, r *http.Request) {
w.Write([]byte("Welcome!"))
}
func createFBS(w http.ResponseWriter, r *http.Request) {
var fbs []int
for i := 0; i < 1000000; i++ {
fbs = GetFibonacciSerie(50)
}
w.Write([]byte(fmt.Sprintf("%v", fbs)))
}
func main() {
http.HandleFunc("/", index)
http.HandleFunc("/fb", createFBS)
log.Fatal(http.ListenAndServe(":8081", nil))
}
```
运行后,HTTP服务会多出/debug/pprof的endpoint,可用于观察应用程序的情况
# 分析
### 交互式终端使用
**分析程序cpu的使用情况,默认采样时间30s**
终端运行:`go tool pprof http://127.0.0.1:8081/debug/pprof/profile?seconds=10`
- `top`命令可以查看在采样时间内消耗cpu的占比
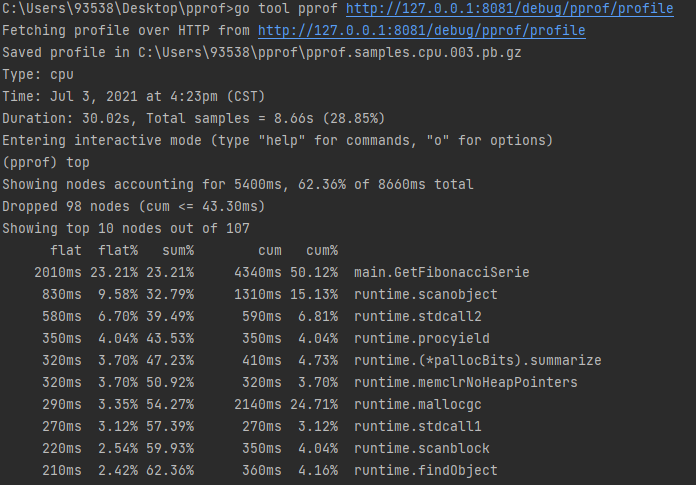
`flat`:函数执行所占用的时间
`flat%`:函数执行所占用的比例
`cum`:当前函数加上它之上的调用运行总耗时
`cum%`:同上的 CPU 运行耗时总比例
- `list $functionName`命令可以分析函数
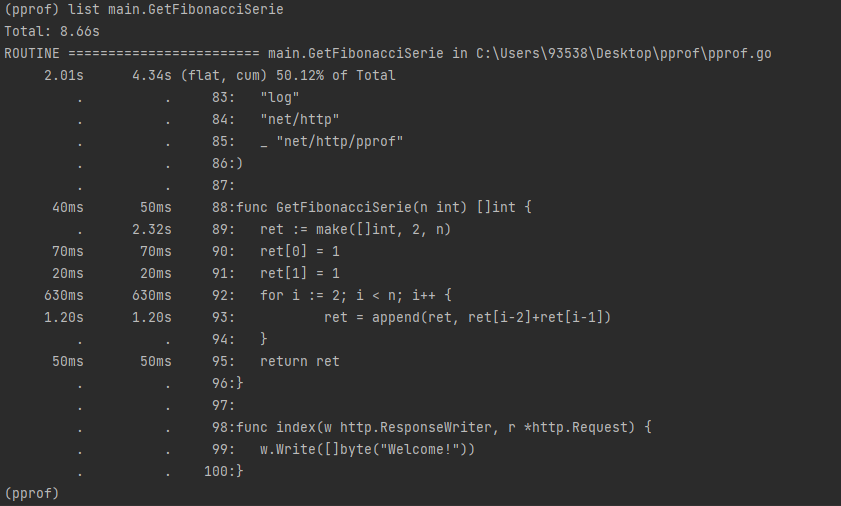
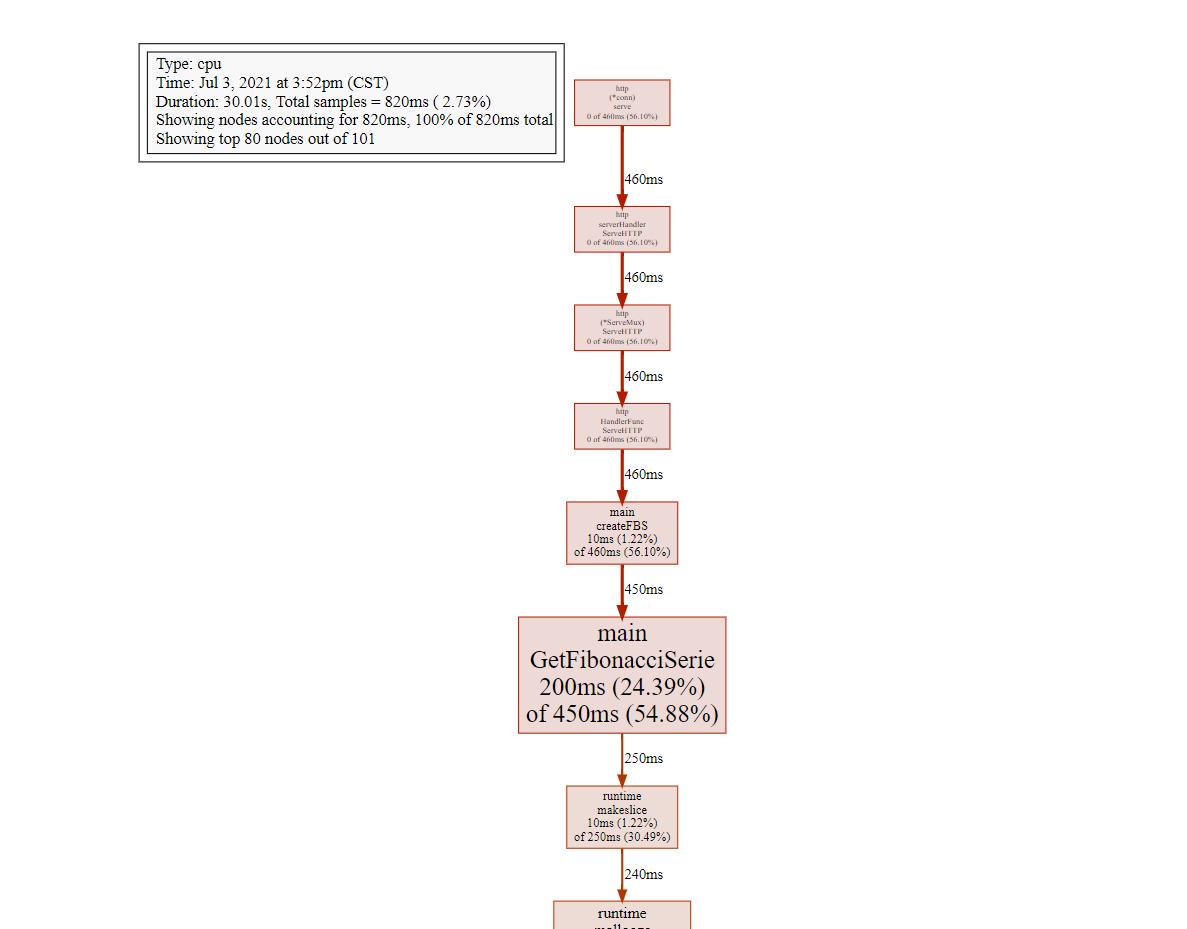
- `web`命令可以网页查看,`svg`命令可以导出可视化图像,需要提前安装graphviz(请右拐谷歌)
**其他类型指标**
block(Block Profiling):`$HOST/debug/pprof/block`,查看导致阻塞同步的堆栈跟踪
goroutine:`$HOST/debug/pprof/goroutine`,查看当前所有运行的 goroutines 堆栈跟踪
heap(Memory Profiling): `$HOST/debug/pprof/heap`,查看活动对象的内存分配情况
mutex(Mutex Profiling):`$HOST/debug/pprof/mutex`,查看导致互斥锁的竞争持有者的堆栈跟踪
threadcreate:`$HOST/debug/pprof/threadcreate`,查看创建新OS线程的堆栈跟踪
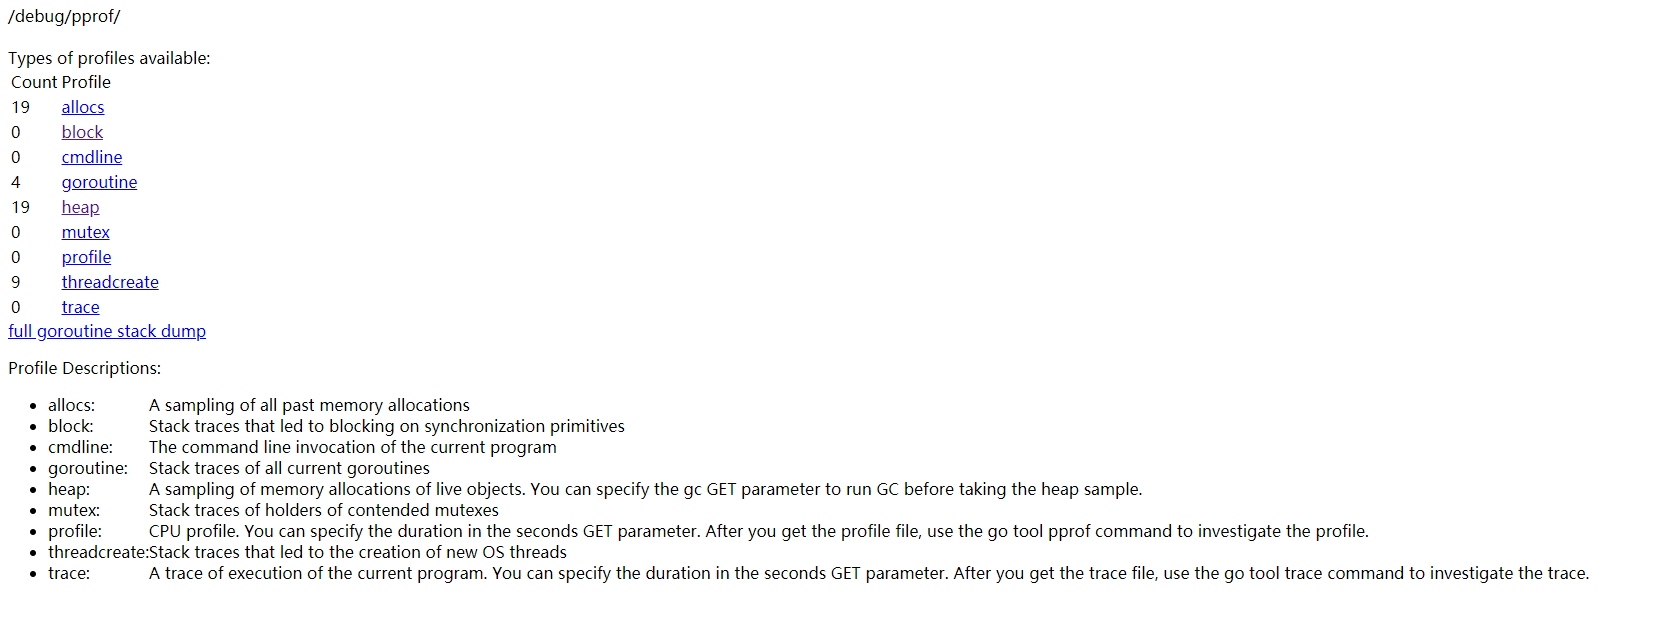
### Web 界面
访问`http://127.0.0.1:8081/debug/pprof`可以在web 界面查看程序运行情况
### 报告生成
**go-torch生成火焰图**
- windows10 安装go-torch
```
go get github.com/uber/go-torch
然后进入go-torch安装目录,安装FlameGraph。
cd C:\Users\93538\go\src\github.com\uber\go-torch
git clone https://github.com/brendangregg/FlameGraph.git
然后将FlameGraph路径添加到Path环境变量中.
C:\Users\93538\go\src\github.com\uber\go-torch\FlameGraph
要执行.pl文件,需要安装 Perl 语言的运行环境,windows 10 安装 ActivePerl。
从官网或者百度网盘直接下载源程序按照默认设置完成安装。
https://pan.baidu.com/s/1nda-NqSm1Kd0gqcGOAv18w
提取码:ksyx
```
- 运行`go-torch --seconds 30 http://127.0.0.1:8081/debug/pprof/profile`,导出 火焰图 图像
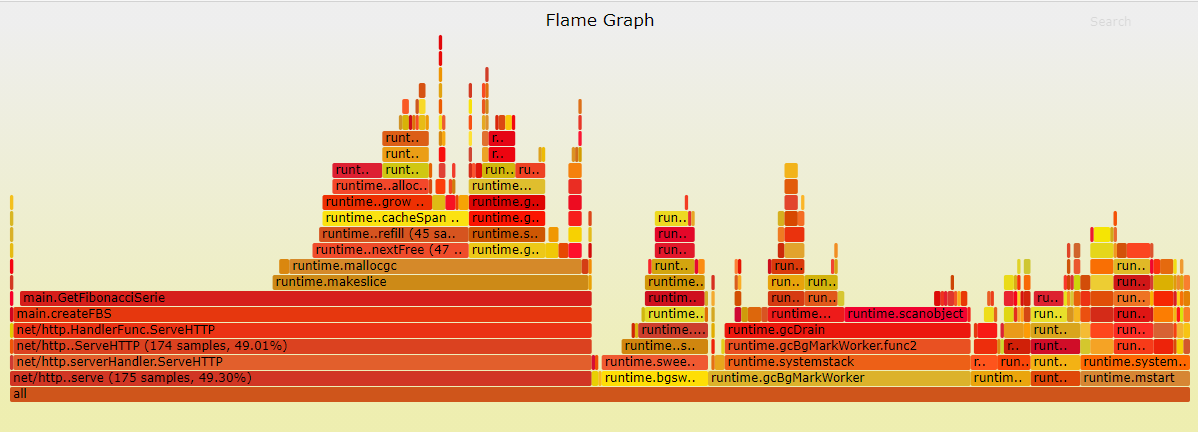
### 基准测试中也可以使用pprof
`go test -bench=. -cpuprofile=cpu.profile`
`go test -bench=. -memprofile=mem.profile`
**通常用 `pprof` 与 `benchmark` 结合,优化程序!!!**

Golang性能分析工具


